How to set the heating/cooling mode of a KNX room thermostat
This article describes on how to integrate the KNX room controllers HVAC mode in the ayControl KNX visualisation for iPad, iPhone and Android.
Similar to temperature control, there are different ways to set the HVAC-mode. In general we have 2 possibilities. Either via separate mode control addresses sending 1Bit commands or via one combined mode control address sending 1Byte (8Bit) unsigned commands. In this document we are describing the combined mode control address via sending 1Byte (8Bit) unsigned commands.
Finding the correct KNX Objects for mode control depending on brand/model of the KNX room thermostat
You have to find out how HVAC modes can be changed in your KNX room thermostat. This is well documented in the manual delivered with your device.
If you are not completely sure, please contact the technical support of the manufacturer of the room thermostat and ask for further assistance.
Combined mode control via 1Byte
In this method all HVAC modes are controlled using 1 object. The datapoint type type of this object is 1Byte (value 0-255). Modes can be switched by sending specific values to this object. Example: value 1 = “Comfort”, value 2 = “Standby”, value 3 = “Night”, etc.
Assign a group address to this object. This group address is later used by ayControl to switch between the modes.
Status of HVAC mode 1Byte
This object is important to display the current mode correctly in ayControl and especially if remote control is used, this is very useful.
Check how your KNX room thermostat is delivering the heating mode status feedback and connect necessary group addresses to the object. Make sure that the read-flags are set in ETS.
When all KNX programming is done, connect with ETS and use the group monitor to check if you can set and read the HVAC mode of the room thermostat and if it corresponds to the mode which is displayed on the KNX room thermostats display in case it has such.
Preparing the ayControl KNX configuration in the ayControl Editor
If all settings and tests with ETS are done, it’s time to prepare the ayControl configuration with the ayControl Editor.
Import and combine the group addresses
Export the project in ETS. Import the latest version of the KNX project as .knxproj to your ayControl configuration. This step is necessary to load all relevant group addresses which are needed for HVAC control. Group addresses for switching the HVAC mode have to be always set as write only. Group addresses for getting the status have to be set as read only.
How to import and update group addresses in the ayControl Editor is further described in the manual.
Create “Buttons” for HVAC mode control
Use a Button for switching from one HVAC mode to another. You have to create a Button for each HVAC mode.
Create a Button for each HVAC mode while choosing the same 1Byte group address in all Buttons. The Button send value should be set depending on the Button’s functionality. E.g. value 1 = “Comfort”, value 2 = “Standby”, value 3 = “Night”, etc.
Please check the manual of your KNX room thermostat if you are not sure which values are accepted.
Create “Value Display” for displaying current HVAC mode
To display which mode is currently selected, a Value Display should be used. Create a new Value Display, select the prepared HVAC Status group address. To make the Value Display show text instead of raw (1, 2, 3…) values, define a text mapping. If you are unsure on how to do this, have a look into the configuration guide.
After you are finished with creating all necessary control elements, place them in an page in the profile structure.
Further notes and tips
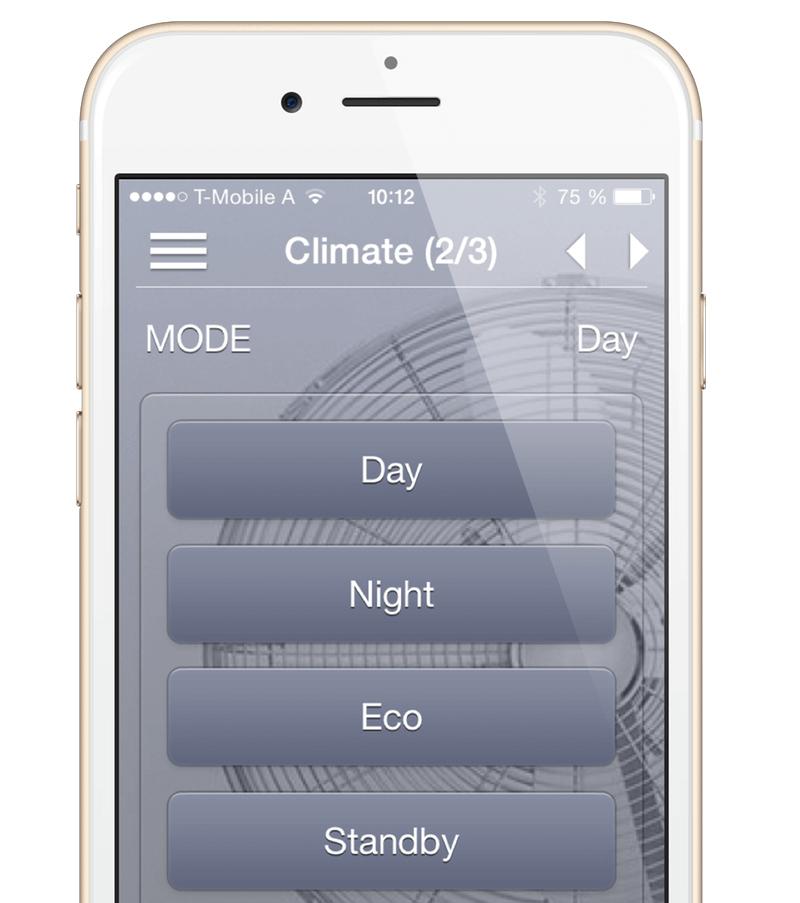
If you are done in the ayControl Editor, we strongly recommend testing it. Transfer the project to a moble device and check if ayControl can control the KNX room thermostat. ayControl should be able to switch between HVAC modes and display the current mode e.g. Comfort as text in the Value Display.
These values should be also affected if the room thermostat is controlled in another way like with the buttons on the KNX room thermostat or via another KNX visualisation.